Portland Guitar Co. | Portland Oregon | Contact Jay Dickinson-503.245.3276 | jay@portlandguitar.com
Portland Guitar Pretty Good Intonation (PGPG) System
Finished Build
Orchestral Model OM 2.12.58
ForWalt H.
Walnut Body
Sitka Spruce Top
Mahogany Neck
Pistachio Fretboard, Bridge, and Headstock
Maple Binding
Herringbone Purfling
Gold Frets & Gotoh Tuners
25.4 Inch Scale Length
Page 8
 ( 415 ) 27-Aug-2013
As the lacquer dries and cures I turn my attention to making the bridge. We are using a piece of Pistachio to match the fretboard and headstock. In this picture I am shaping the bottom of the bridge blank to match the shape of the top of the guitar. I have a large sanding block that has the proper shape that I run the bridge blank over.
 ( 416 ) 27-Aug-2013
After a bit of applied elbow grease the bottom of the bridge blank matches the top of the guitar.
 ( 417 ) 27-Aug-2013
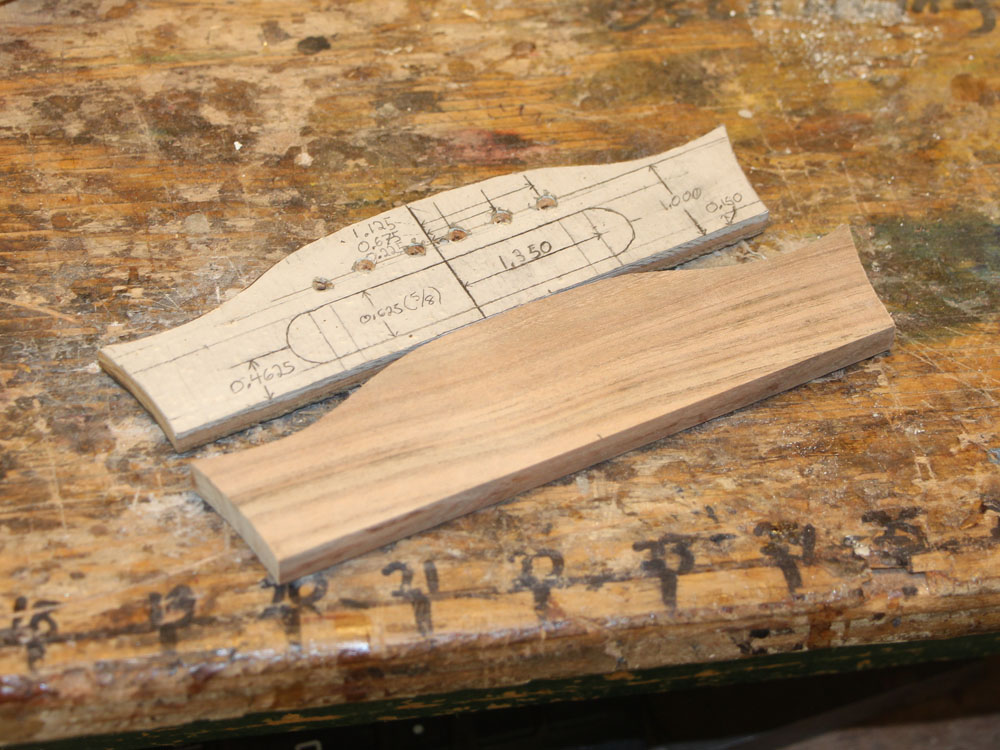
I lay out the design with the aid of a template.
 ( 418 ) 27-Aug-2013
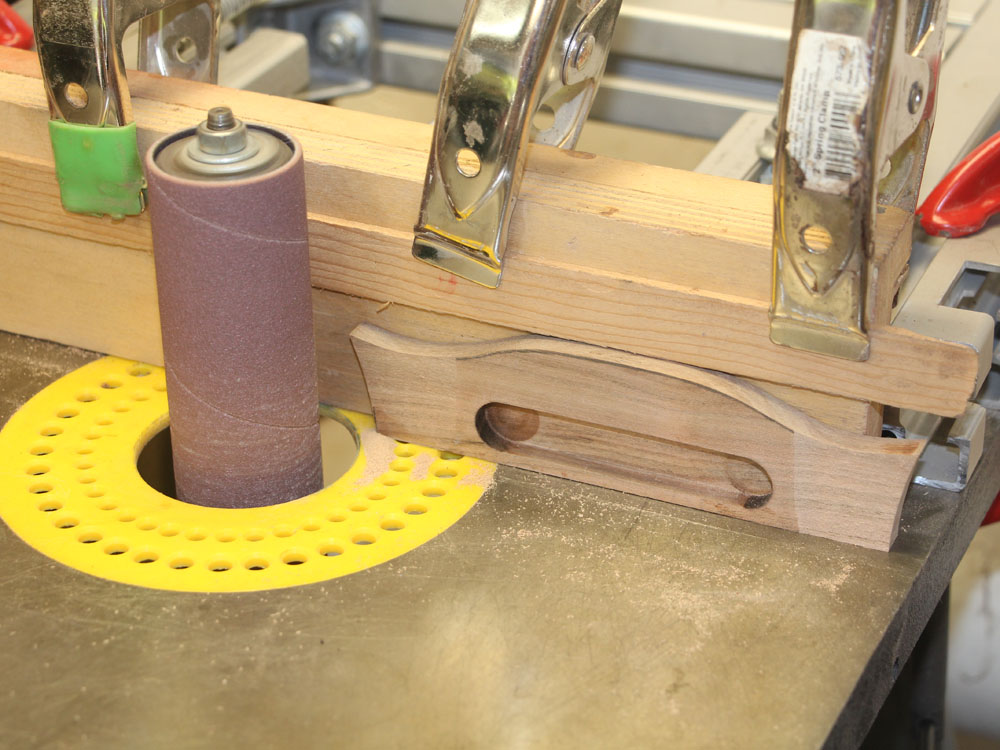
The oscillating sander trims the perimeter.
 ( 419 ) 27-Aug-2013
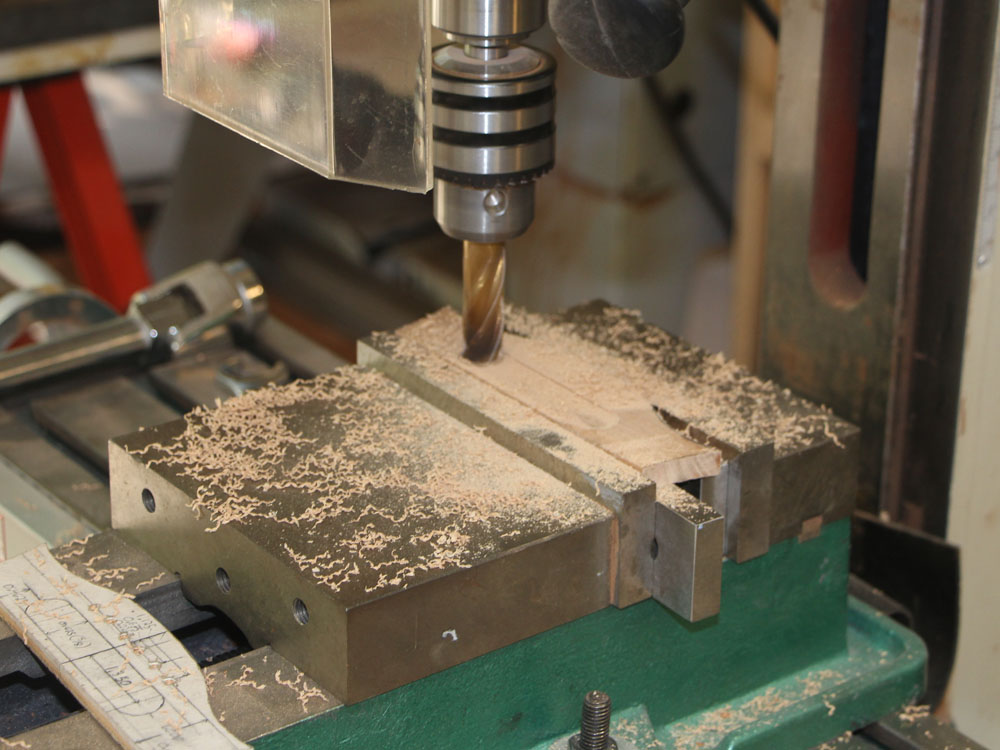
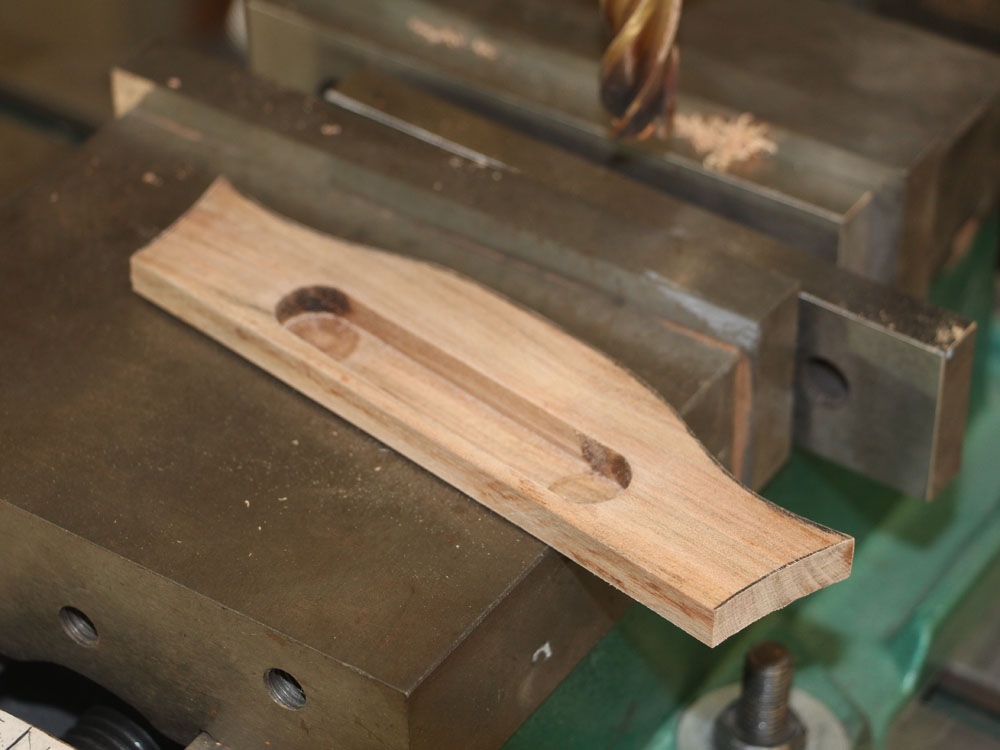
I use the milling machine to create the saddle plate channel.
 ( 420 ) 27-Aug-2013
 ( 421 ) 27-Aug-2013
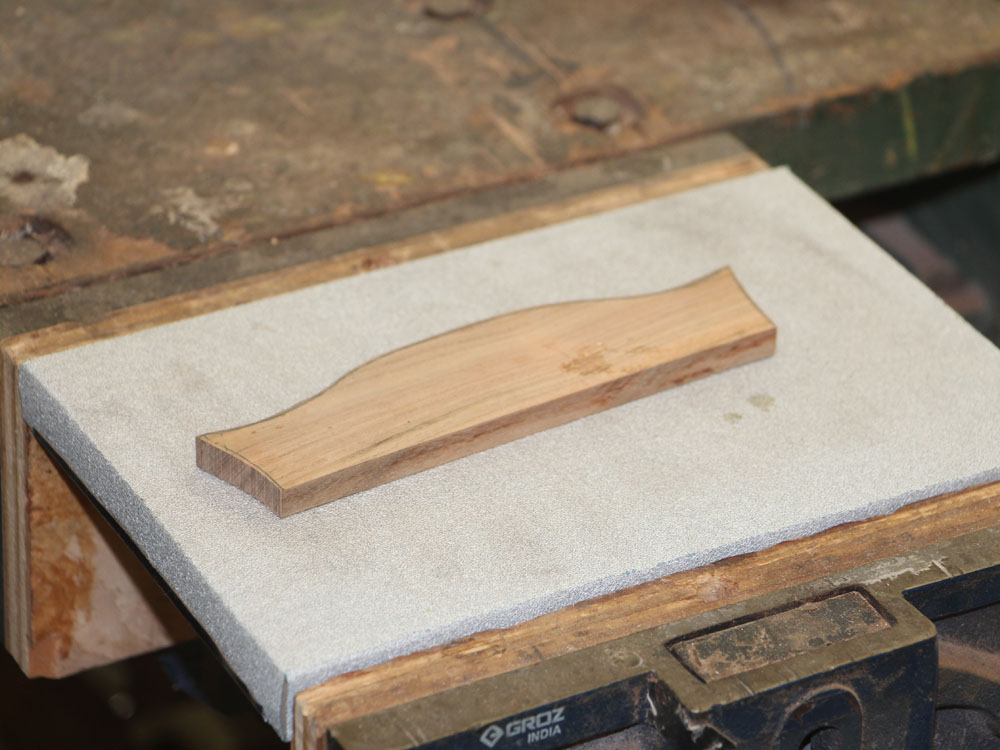
I have an adjustable platen that I use with the oscillating sander to fashion the wings. I run the blank into the sander removing 10 or 15 mil of material with each pass. After several passes the wings end up about 60 mil thick.
 ( 422 ) 27-Aug-2013
To make the bass side wing, the upper guide rail lets me turn the blank upside down. By turning the blank over on each pass the two wings end up being exactly (if that is possible) the same thickness.
 ( 423 ) 27-Aug-2013
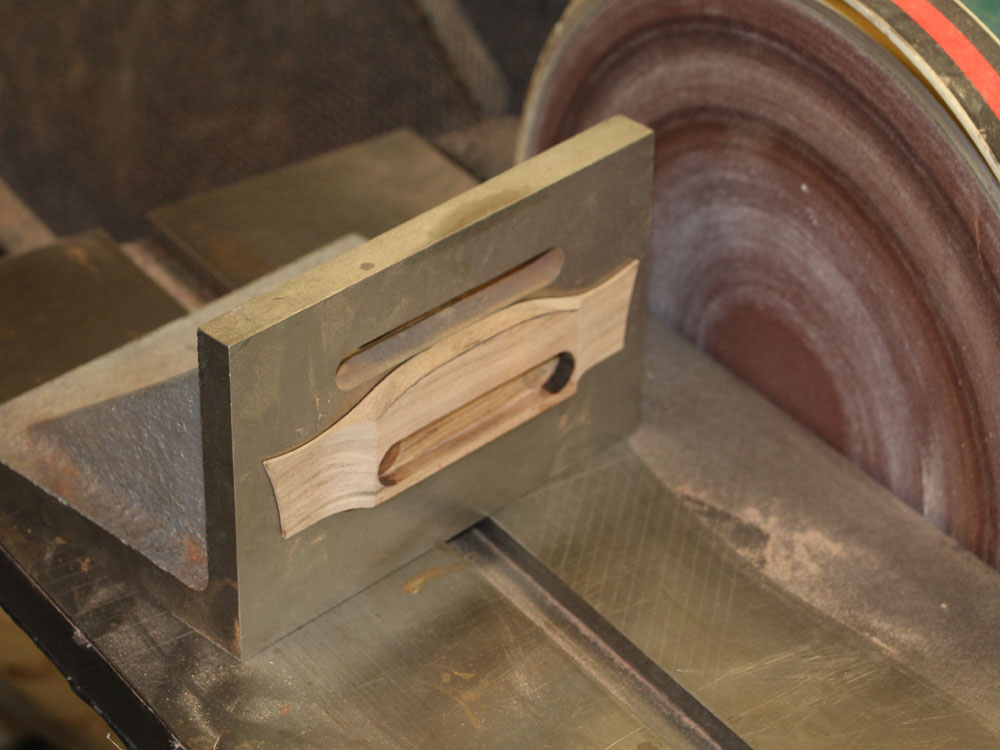
I attach the blank to a right angle support so I can sand a gentle arch on the top of the bridge.
 ( 424 ) 27-Aug-2013
I also bevel the front face of the bridge just to make it look right and round off the back.
 ( 425 ) 27-Aug-2013
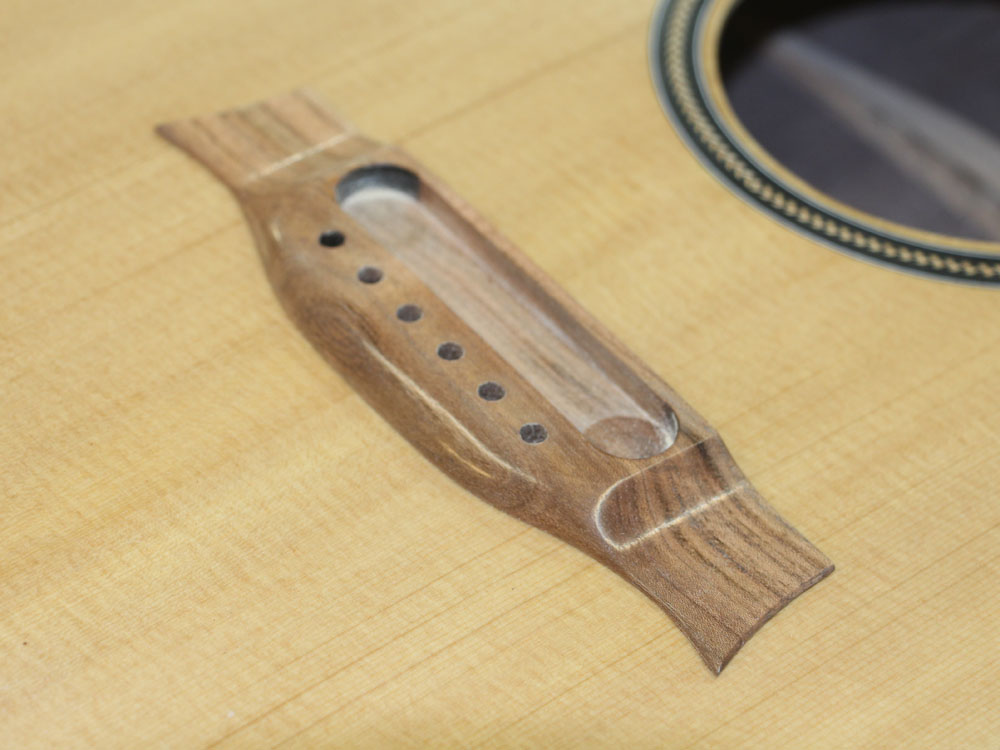
The milling machine helps me accurately drill the bridge pin holes.
 ( 426 ) 27-Aug-2013
The wood has enough natural oil to allow a nice shine to come through.
 ( 427 ) 27-Aug-2013
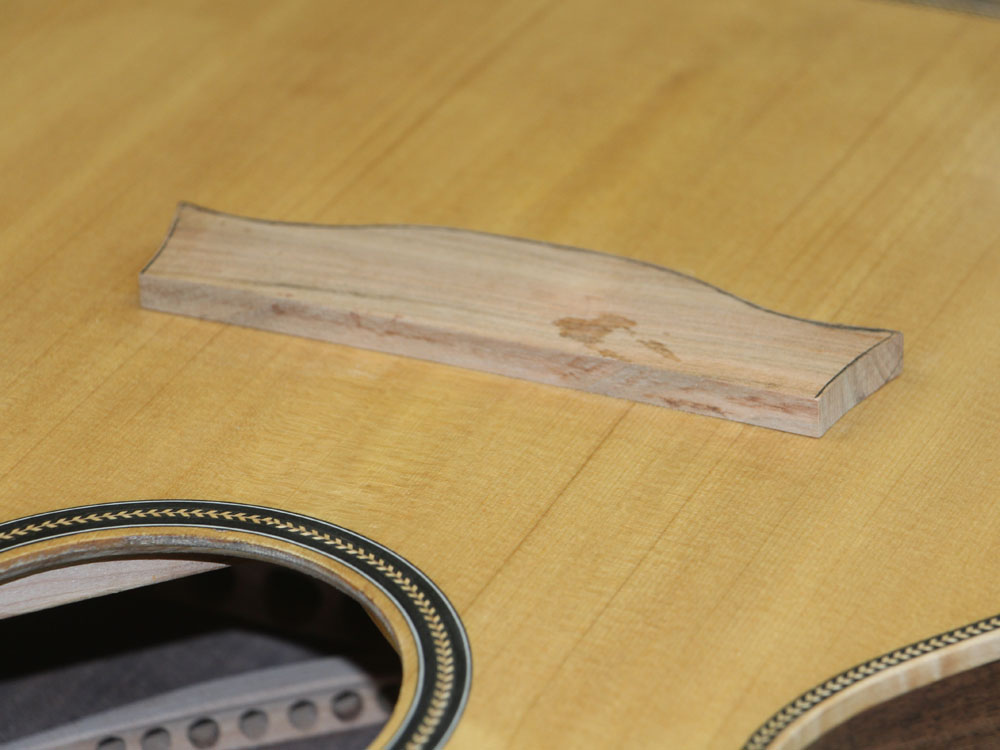
I have template to help me position the bridge on the top of the guitar.
 ( 428 ) 27-Aug-2013
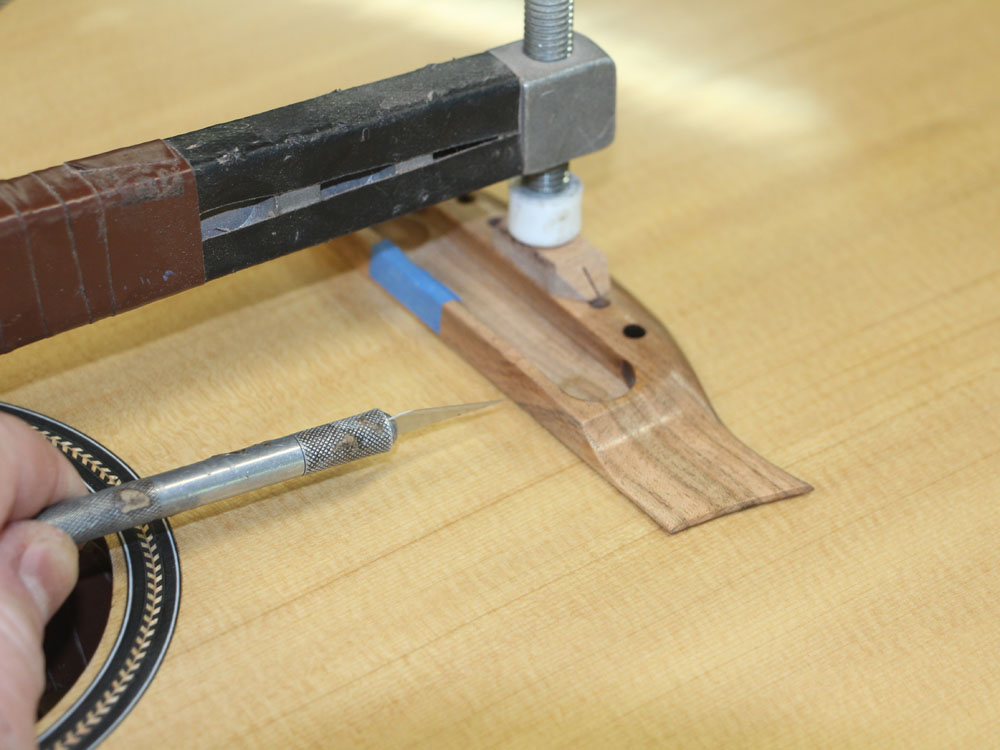
Using a freshly sharp blade I cut through the lacquer around the perimeter of the bridge.
 ( 429 ) 27-Aug-2013
Glue won't stick very well to the lacquer, so I need to remove the finish on the inside of the perimeter so I can make a good wood to wood glue joint between the bridge and the top of the guitar.
 ( 430 ) 27-Aug-2013
I first use a sharp chisel to clear the perimeter and then follow up with sandpaper for the interior.
 ( 431 ) 27-Aug-2013
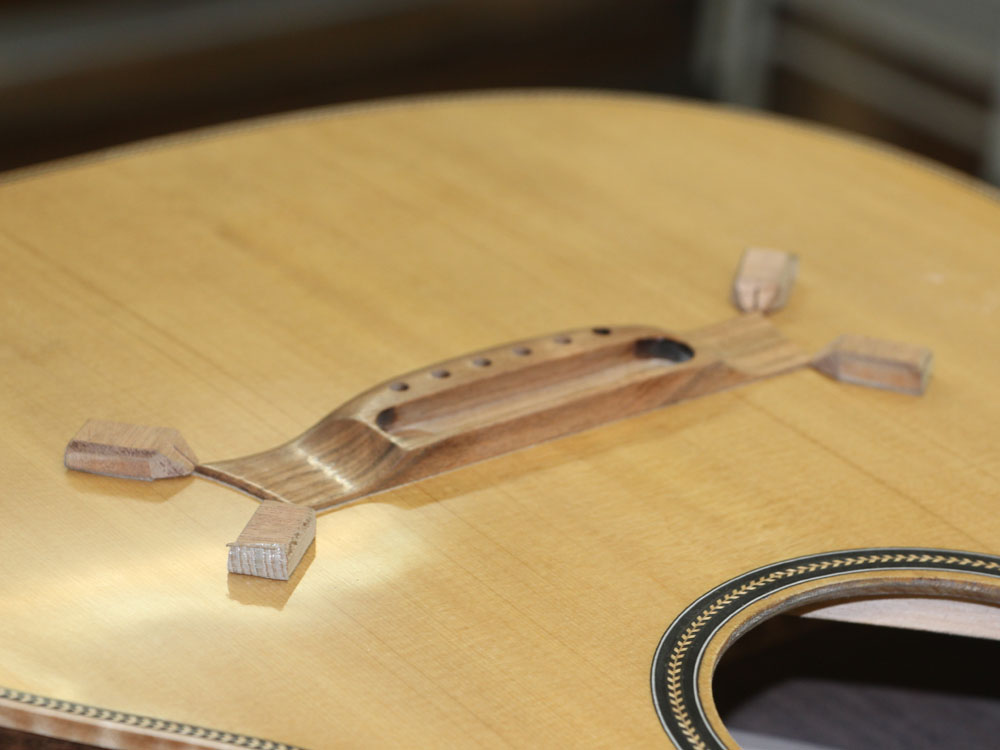
A few blocks will help hold the bridge steady as it is glued in place.
 ( 432 ) 27-Aug-2013
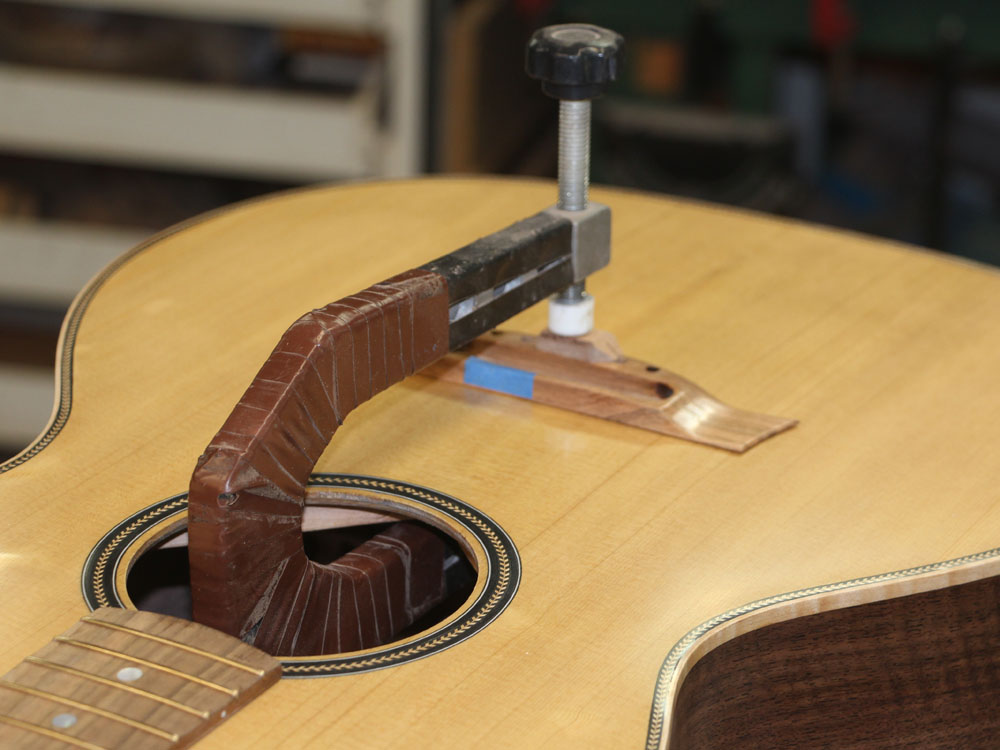
I use a long throat C-clamp to glue the bridge down.
 ( 433 ) 27-Aug-2013
I install the tuning machines next.
 ( 434 ) 27-Aug-2013
After the bridge has set, I drill the bridge pin holes.
 ( 435 ) 27-Aug-2013
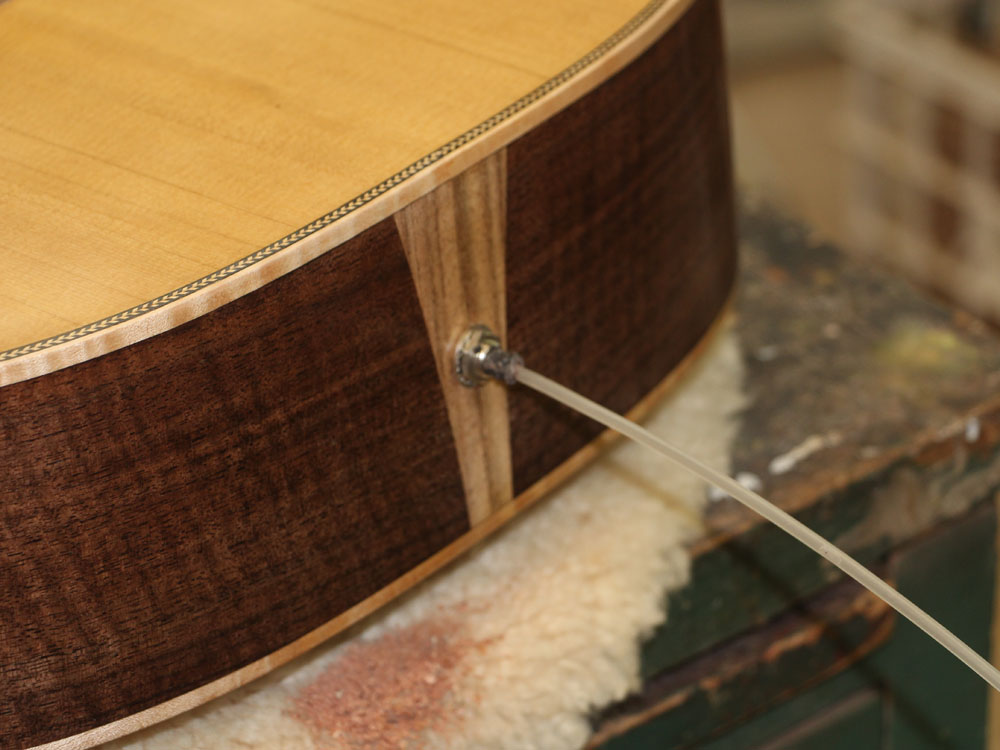
And a hole in the tail graft is drilled for the output jack.
 ( 436 ) 27-Aug-2013
I use a flexible rod to draw the jack through the hole.
 ( 437 ) 27-Aug-2013
Next I ream the bridge pin holes to fit the bridge pins.
 ( 438 ) 27-Aug-2013
The saddles rest on a pair of saddle channel plates. The individual saddles will ultimately be glued to the first plate, while the second plate will be used to position the height and the angle of the saddle plate.
 ( 439 ) 27-Aug-2013
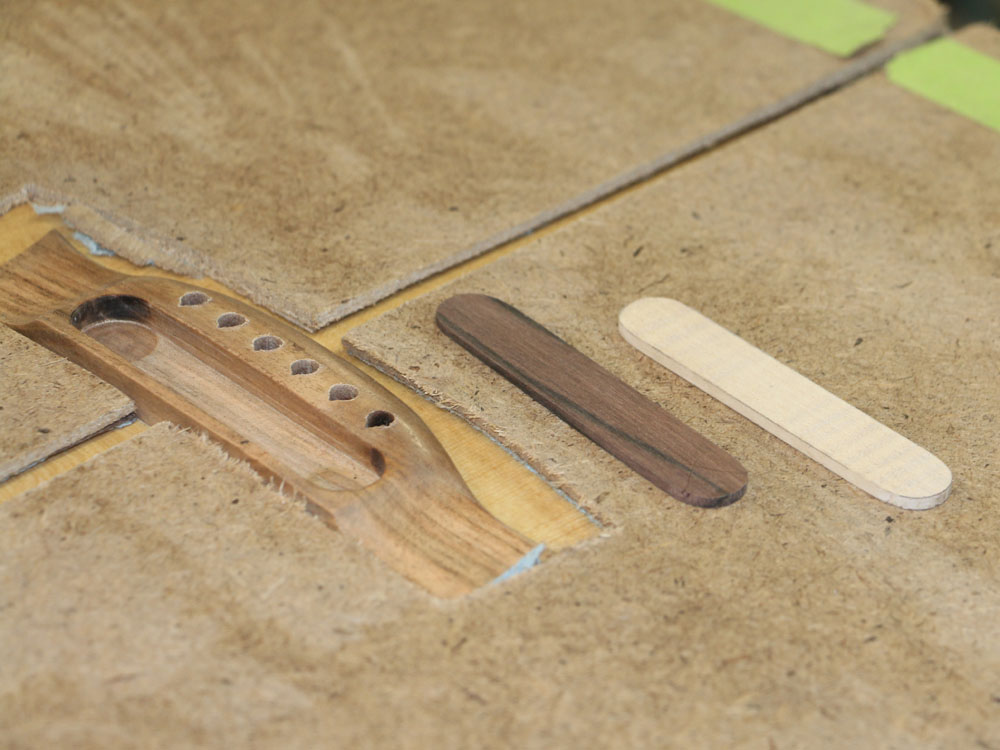
The nut and saddles are made from bone.
I notch
the position of the strings on the nut blank with a set of special files.
 ( 440 ) 27-Aug-2013
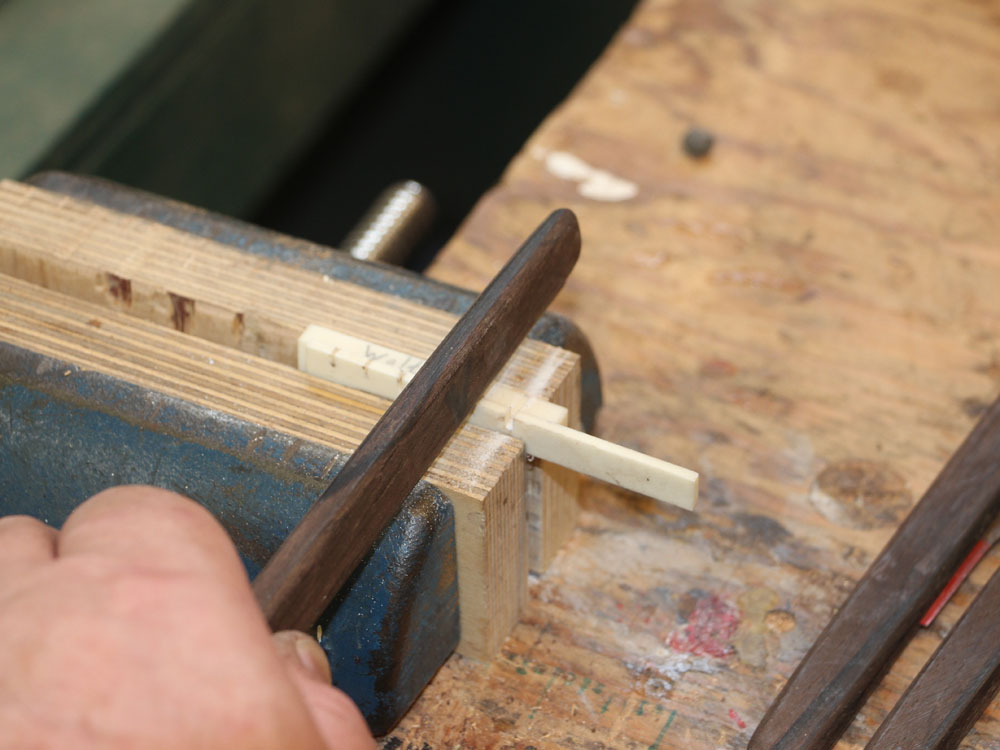
I make a little bone saddle for each string. The saddles are a little like sculptures in miniature.
 ( 441 ) 27-Aug-2013
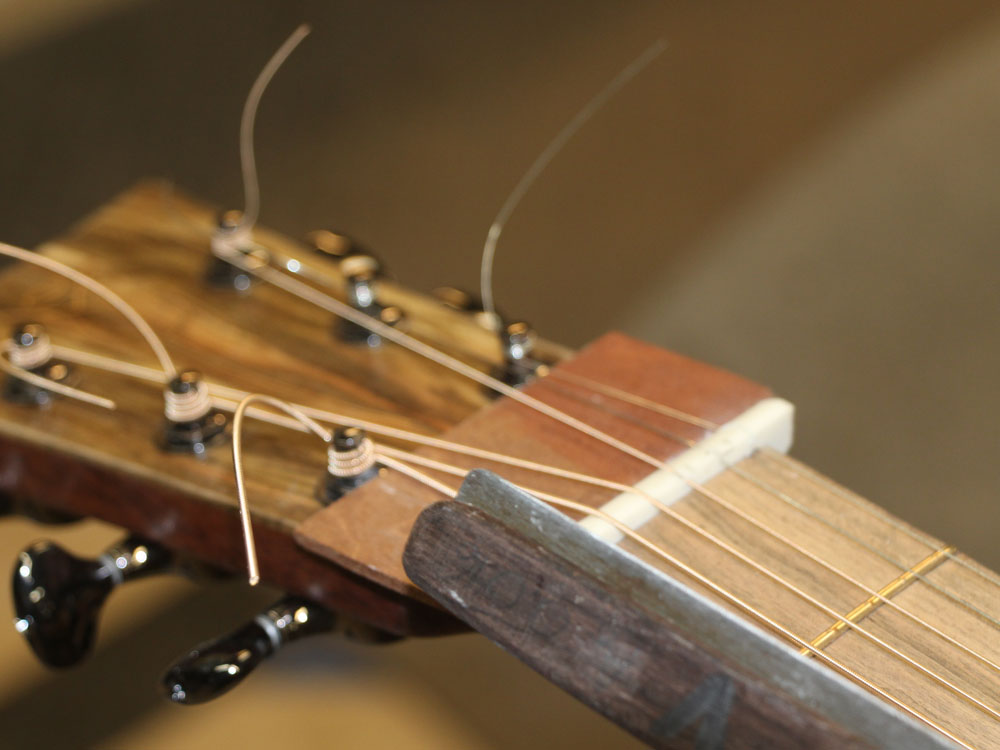
After the strings are installed I fine tune the height of each string at the nut
 ( 442 ) 27-Aug-2013
And finally I install a maple trussrod cover. That finishes the guitar, or at least I am going to stop working on it for a while as nothing is every really finished. I expect the guitar to mature and age into its own character while bringing joy and love into the world.
